The Shocking Truth: The Importance of Regular Maintenance for Your Electric Vehicle Charging Systems and Outlets

EV Charging System in Residential Garage

Introduction

As electric vehicles (EVs) become increasingly popular, the need for efficient and reliable charging infrastructure has never been greater. EV owners depend on their charging systems to keep their vehicles running smoothly, and one key aspect of ensuring this reliability is regular maintenance. Just like any other electrical system, your EV charging equipment and outlets require periodic attention to ensure safety and efficiency. In this blog post, we will discuss the critical importance of regular maintenance for your electric vehicle charging systems and outlets, emphasizing the role of trained electricians and the need for vigilant monitoring.

1. Safety First: The Role of Trained Electricians with EV-Specific Training

Regular maintenance of your EV charging system should never be a DIY endeavor. Just as you wouldn't tinker with your home's electrical panel without proper training, the same goes for your charging equipment. Trained electricians with specific related training, such as the Electric Vehicle Infrastructure Training Program (EVITP), possess the expertise to perform maintenance tasks safely and effectively. They can:

  • Inspect the entire system to identify potential issues.

  • Ensure that the electrical connections are tight and secure.

  • Verify that the system complies with local electrical codes and safety standards.

Engaging a qualified electrician with EV-specific training for maintenance not only guarantees your safety but also maintains your system's warranty and ensures it continues to function optimally. EVITP training ensures that electricians are well-versed in the specific requirements and safety protocols for EV charging systems.

2. Monitoring for Heat: A Crucial Task

Heat can be the silent enemy of electric vehicle charging systems. When components become excessively hot, they can pose a fire risk and potentially damage the equipment. Regular monitoring is essential to detect early signs of overheating and address them promptly.

Trained electricians with EV-specific training have the tools and knowledge to assess the temperature of your charging system components. They can:

  • Identify any hotspots that may indicate faulty components.

  • Address issues before they escalate, preventing potential damage.

  • Ensure that cooling systems, if present, are functioning as intended.

By actively monitoring for heat, you can protect your investment and minimize the risk of dangerous electrical fires, all under the guidance of electricians with specialized training in EV infrastructure.

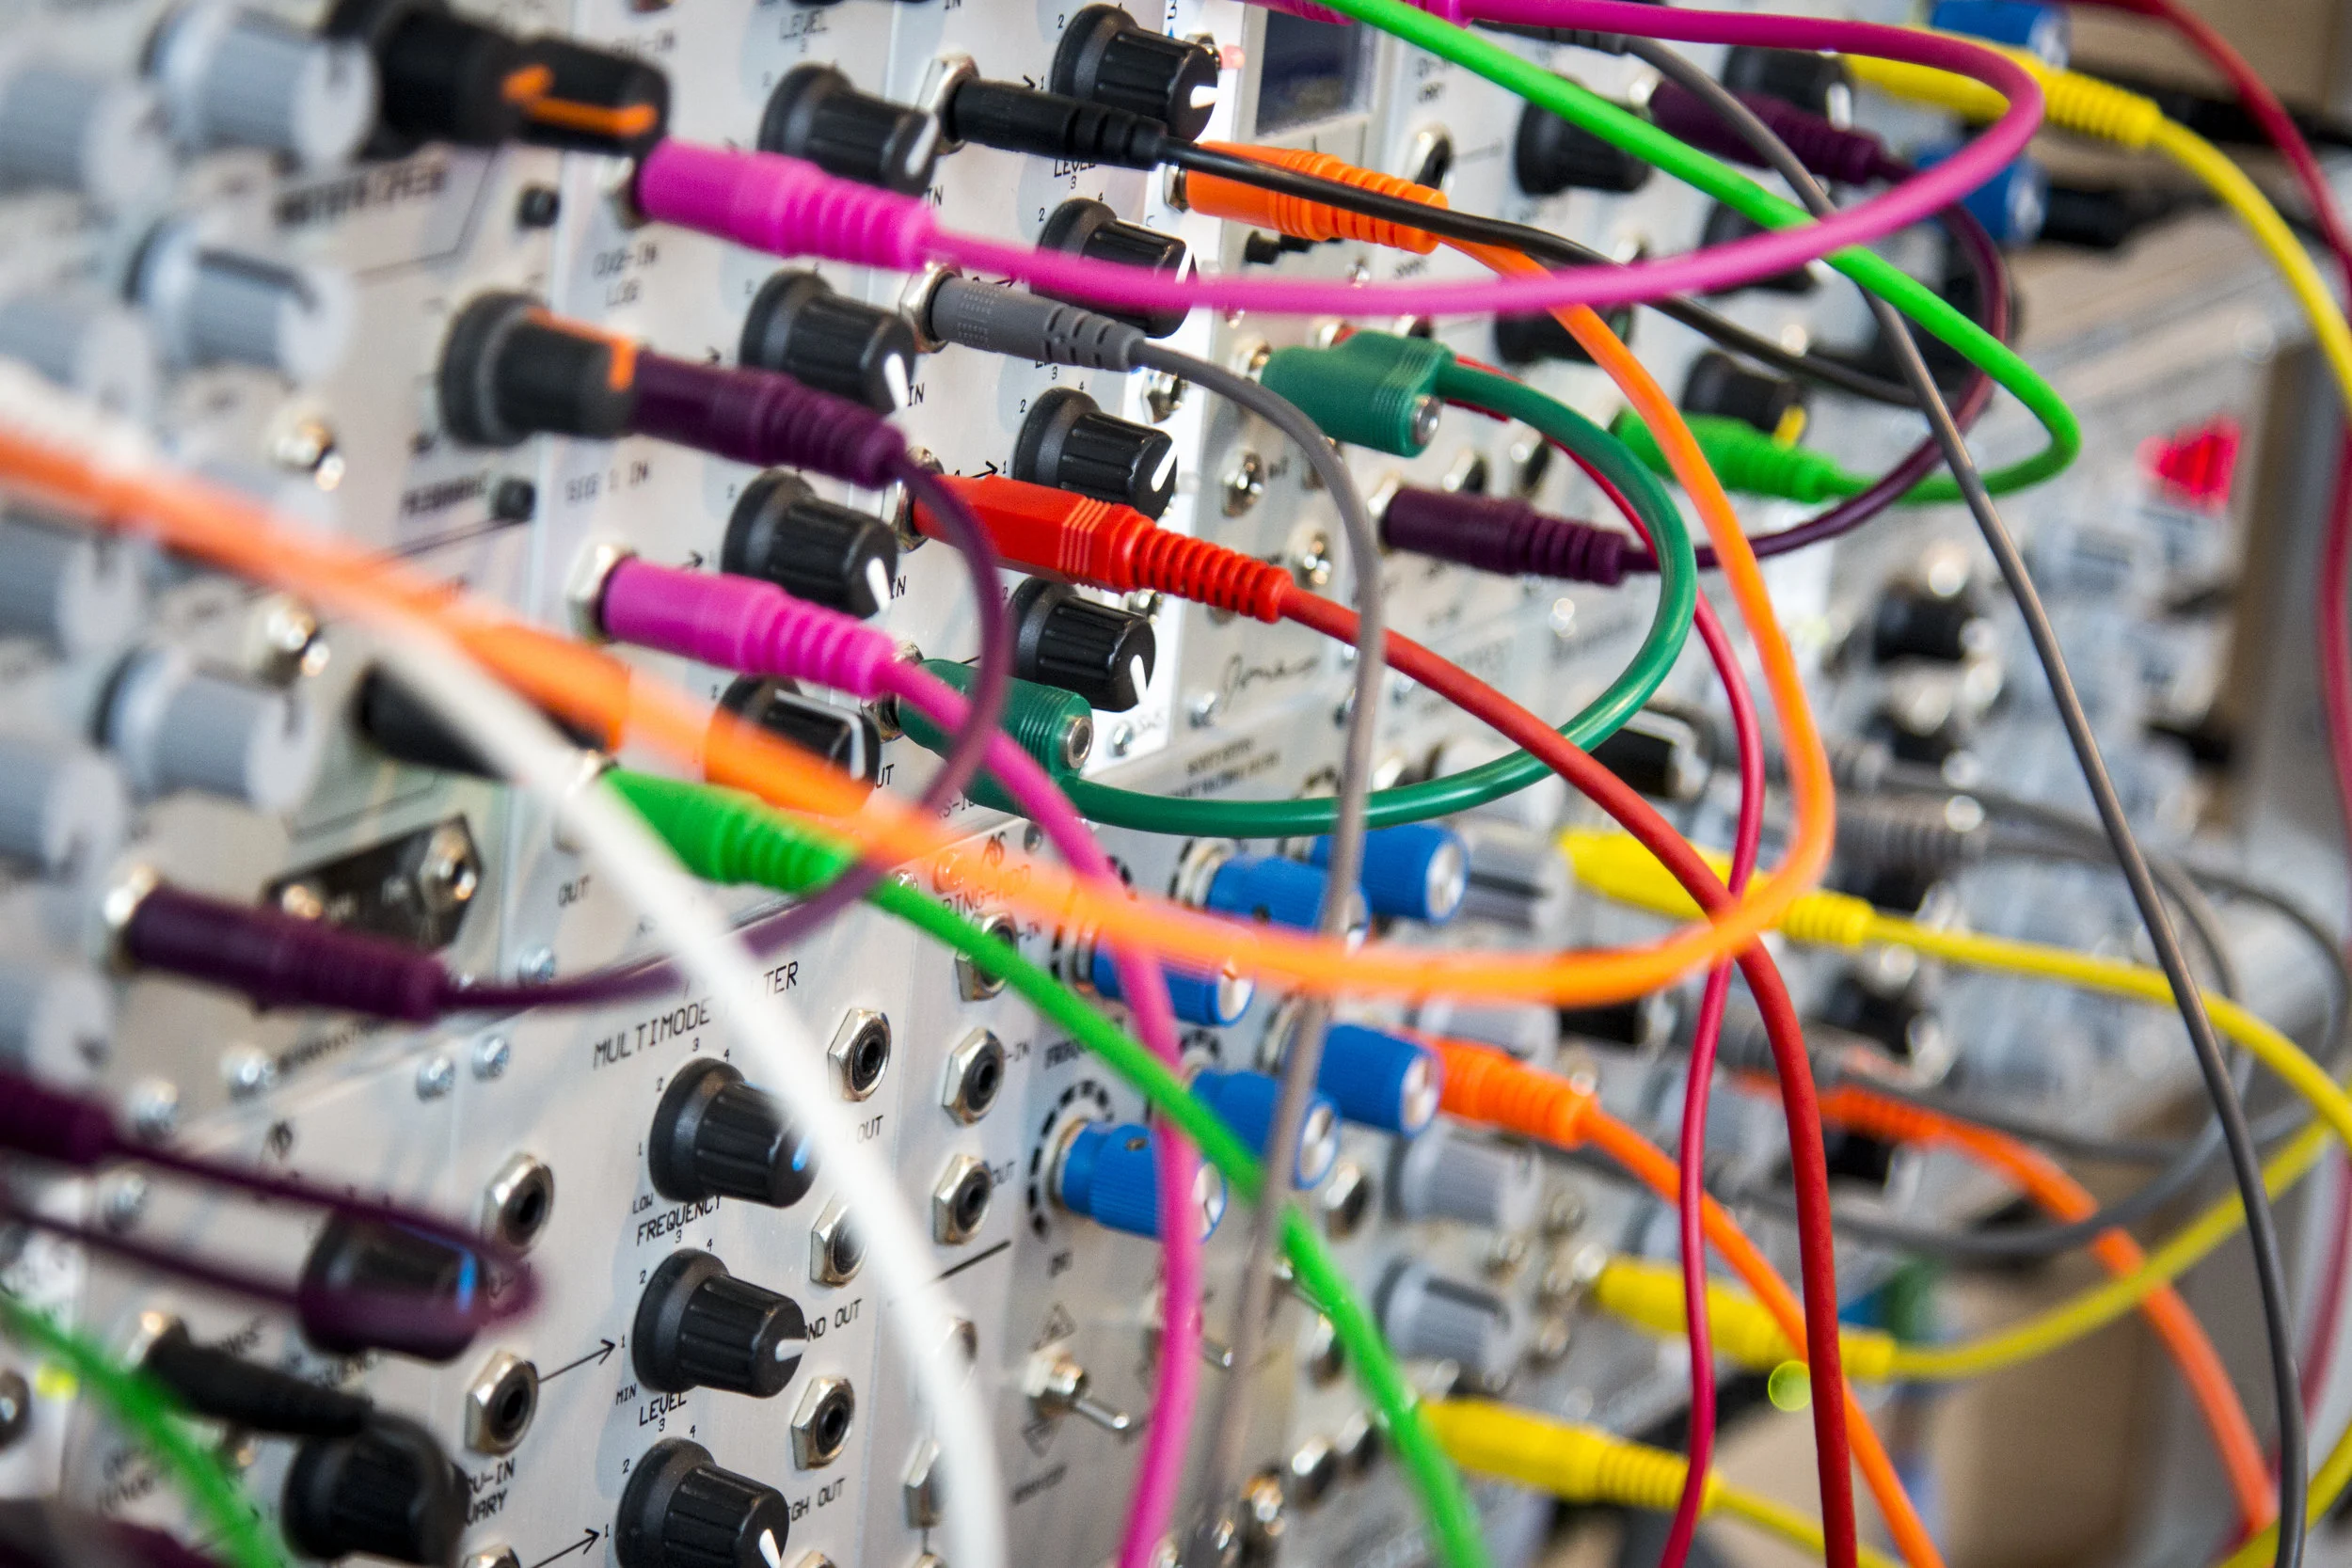
3. Checking Wire Connections and Terminations

One of the most common issues in electrical systems, including EV charging systems, is loose or corroded wire connections and terminations. These can lead to power loss, overheating, and even system failure. Trained electricians with EV-specific training play a crucial role in maintaining your EV charging system by:

  • Inspecting all electrical connections for signs of wear or corrosion.

  • Tightening any loose connections and addressing corrosion issues.

  • Replacing damaged or worn-out components as needed.

By addressing these concerns during routine maintenance, you can maintain optimal charging efficiency and avoid costly repairs down the road. Electricians with EV-specific training understand the unique requirements of EV charging infrastructure, ensuring that the job is done correctly and safely.

4. Preventative Maintenance for Longevity

Regular maintenance of your EV charging system is a form of preventative care. It ensures that minor issues are caught early and resolved before they escalate into major problems. This not only extends the lifespan of your charging equipment but also saves you money in the long run.

In addition to the aforementioned tasks, electricians with EV-specific training can:

  • Clean and lubricate moving parts (if applicable) to prevent wear and tear.

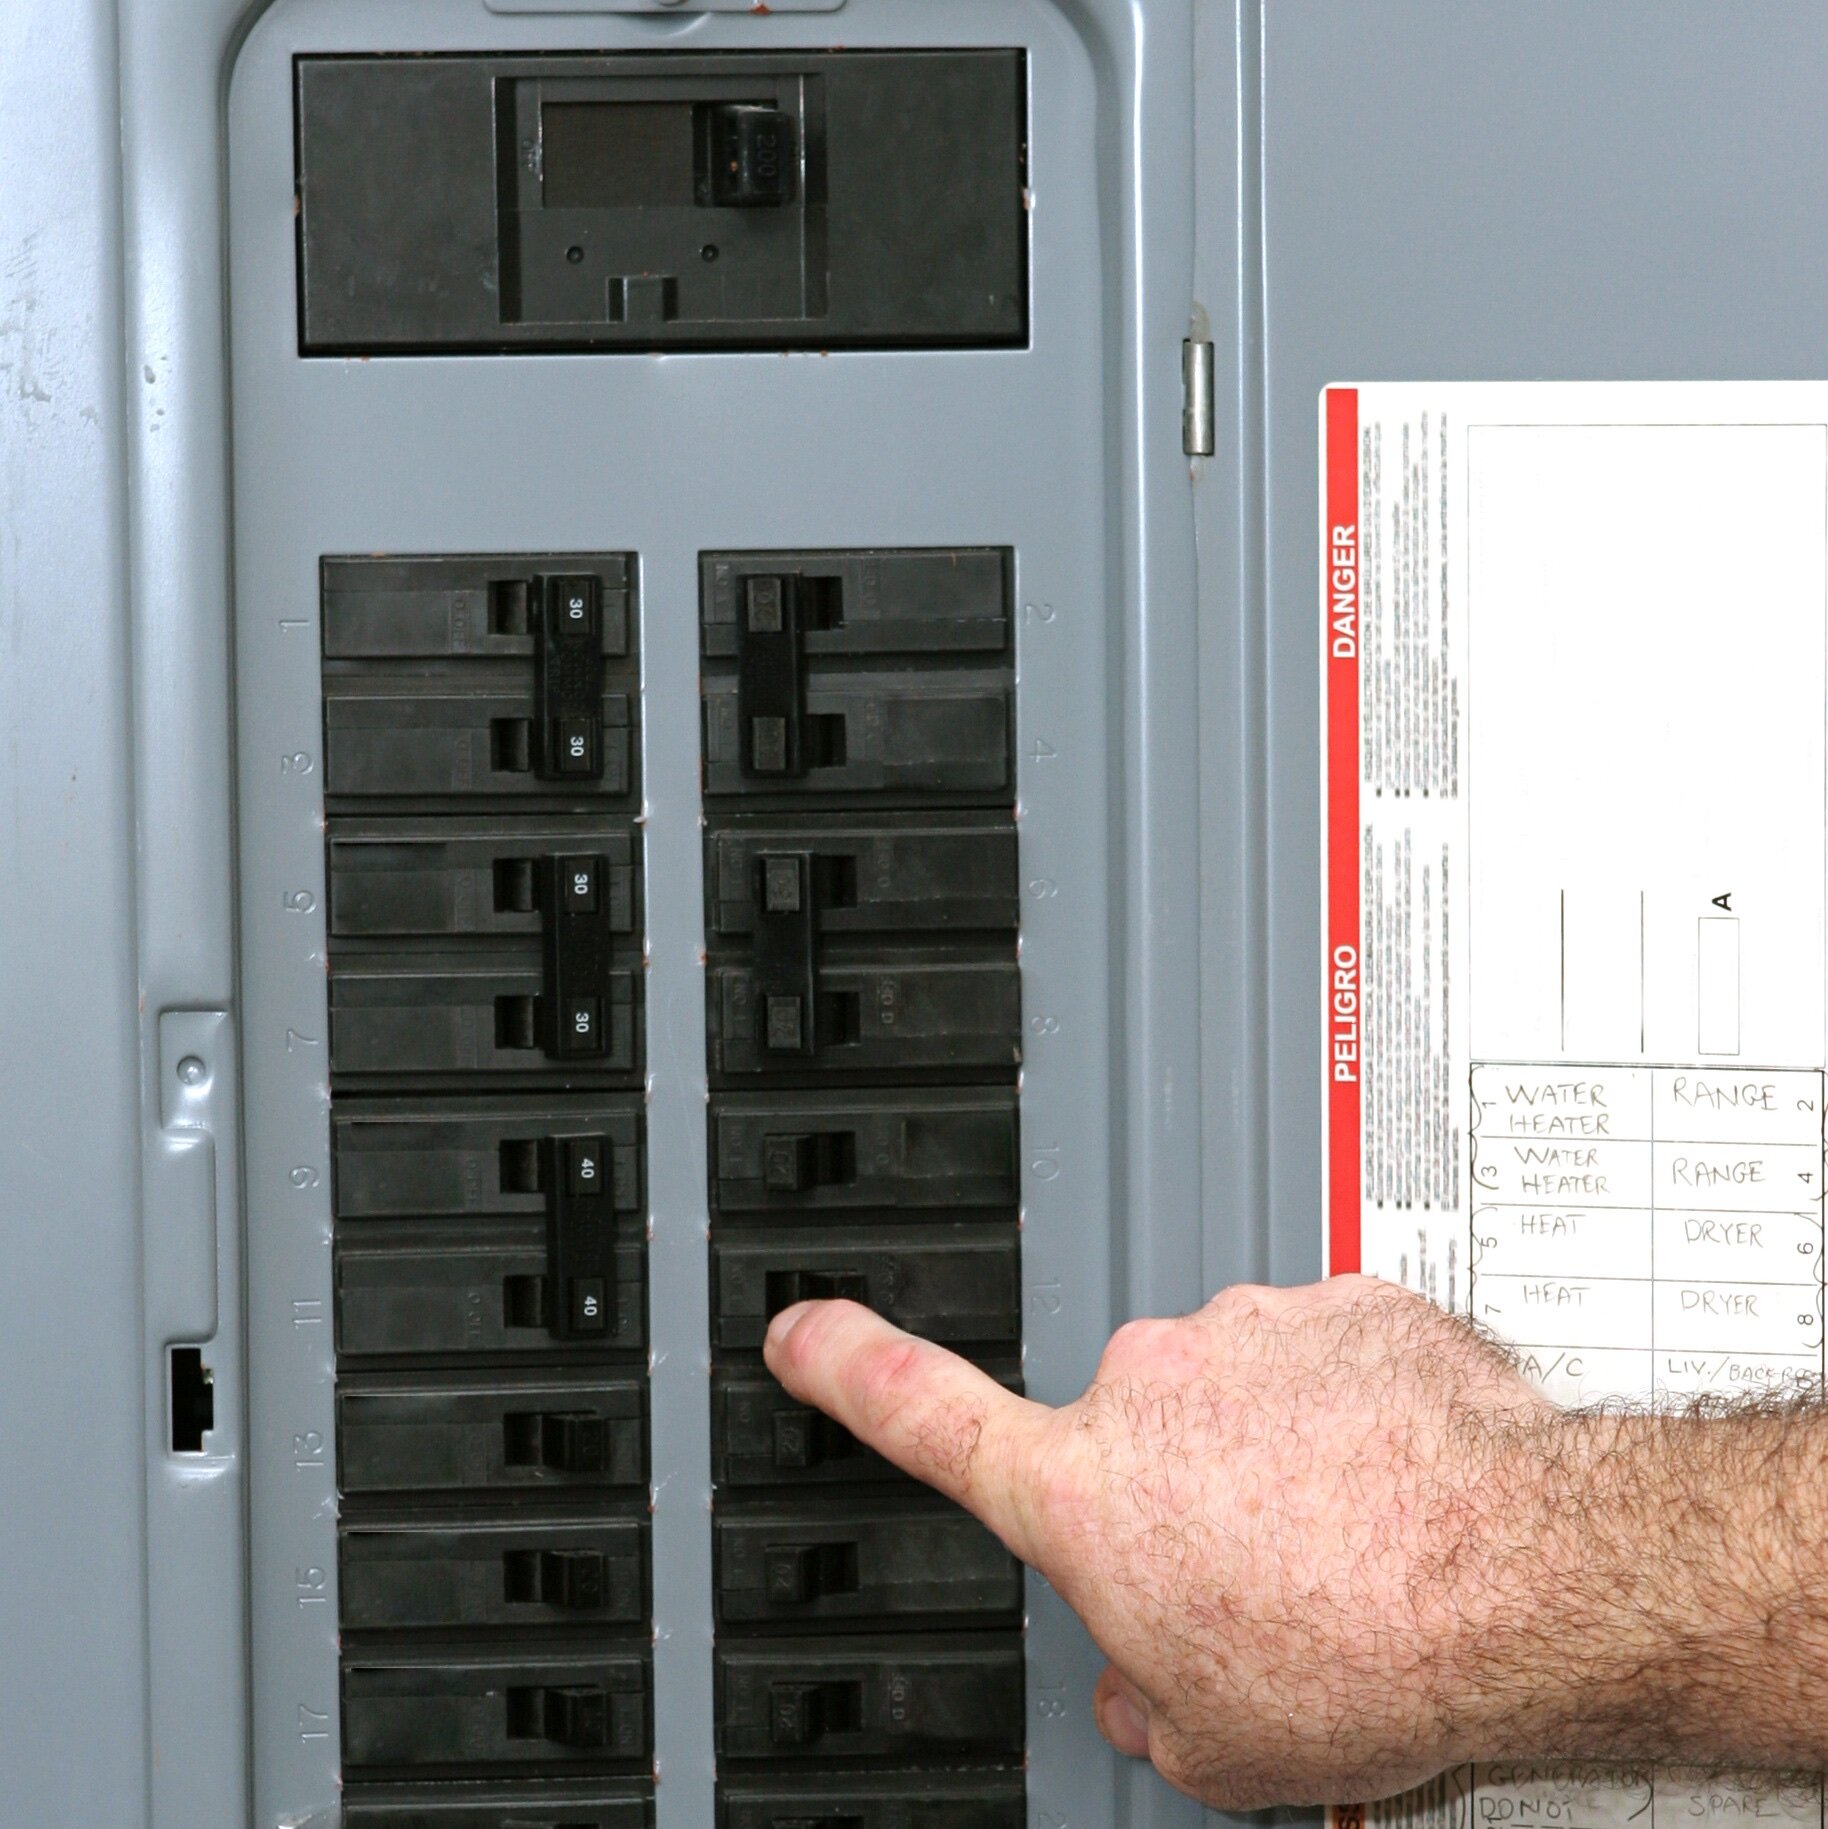
  • Inspect the electrical panel and update any necessary components.

  • Confirm that the system's electrical capacity is sufficient for your vehicle's needs.

Electrician working in panel.

Conclusion

Owning an electric vehicle brings numerous benefits, but it also comes with the responsibility of maintaining your charging infrastructure. Regular maintenance, performed by trained electricians with EV-specific training like the Electric Vehicle Infrastructure Training Program (EVITP), is essential to ensure the safety, efficiency, and longevity of your EV charging systems and outlets. By monitoring for heat, checking wire connections and terminations, and conducting preventative maintenance, you can continue to enjoy the convenience and environmental advantages of electric vehicle ownership. Don't wait until a problem arises; take proactive steps to safeguard your EV charging system today. With electricians trained in EV infrastructure, your peace of mind is assured.


Understanding the Costs of EV Charger Installation

Ford F-150 Lightning EV Charger Installation.

The electric vehicle (EV) revolution is in full swing, and more people are embracing cleaner and greener transportation options. As part of this shift, many are considering installing an electric vehicle charger at home. However, it's important to be aware that the costs associated with EV charger installation can vary significantly based on several factors. In this blog post, we'll explore the various factors that influence the cost of installing an EV charger and provide you with a better understanding of what to expect.

The average cost for the installation of an EV charger can range from $1,000.00 all the way up to $5,000.00 depending on a multitude of factors. This cost range does not include upgrading the existing electrical service which

Factors Influencing the Cost of EV Charger Installation

  1. Charger Type and Power Rating: The type of charger you choose and its power rating play a significant role in determining the cost. Level 1 chargers (120 volts) are generally less expensive than Level 2 chargers (240 volts), but Level 2 chargers provide faster charging speeds. Additionally, the specific power requirements of your EV model can impact the installation cost significantly.

    • F-150 Lightning Extended Range: For example, the Ford F-150 Lightning Extended Range edition requires a robust 100-amp circuit to support its charging needs. This means that the electrical infrastructure for this particular EV must be capable of delivering a substantial amount of power to the charger.

    • Tesla Vehicles: Tesla electric vehicles, depending on the model, typically require a 60-amp circuit. Teslas are known for their quick charging capabilities, and the electrical capacity needed for these vehicles reflects their charging speed.

    • Jeep Wrangler 4xe: On the other hand, the Jeep Wrangler 4xe has more modest power requirements, requiring a 30-amp circuit. This lower amperage rating can result in a less complex and costly installation compared to EVs with higher power demands.

The choice of charger type and its compatibility with your EV model should be carefully considered to ensure that your home's electrical system can support the charger's power requirements. This consideration can significantly impact both the initial installation cost and the long-term convenience of charging your EV at home.

  1. Electrical Capacity and Additional Loads: When assessing the electrical capacity needed for your EV charger installation, it's essential to account for other significant electrical loads within your home. These loads may include:

    • Hot Tubs: Hot tubs typically require dedicated circuits and can draw a significant amount of power when in use. The electrical service should be sized to accommodate both the EV charger and the hot tub without overloading the system.

    • Pools with Electric Heat Pumps: Pools equipped with electric heat pumps for temperature control require additional electrical capacity. The simultaneous operation of a pool heat pump and an EV charger must be factored into the electrical service calculation.

    • Electric Heating Systems: Homes with electric heating systems, such as baseboard heaters or electric furnaces, have higher electrical demands during cold months. These heating systems can place additional stress on your electrical service, and an EV charger must be integrated without overburdening the system.

These additional electrical loads, combined with the power requirements of your EV charger, can necessitate an increase in the size of your home's electrical service. This upgrade ensures that your electrical system can safely and efficiently handle all the electrical demands placed upon it. It's essential to work with a qualified electrical contractor who can perform load calculations and determine whether upgrades are necessary to accommodate your EV charger and other electrical needs. Upgrading your electrical service may involve additional costs but is crucial for maintaining a safe and reliable electrical system in your home.

Existing Infrastructure: The condition of your home's electrical infrastructure can influence the cost. Older homes may require more extensive electrical upgrades to meet modern safety and code standards.

  1. Permitting and Regulations: Installing an EV charger involves adherence to specific regulations and permitting requirements. To ensure safety and compliance, it's essential to work with a licensed electrical contractor accredited by the Electrical Safety Authority (ESA).

    • ESA Licensing: All contractors completing the installation of electric vehicle charging systems must be licensed by the Electrical Safety Authority (ESA) or the relevant regulatory authority in your area. This licensing ensures that the contractor has the necessary qualifications and expertise to perform safe and compliant installations.

    • Permit and Certificate of Acceptance: Your chosen electrical contractor should take out a permit with the ESA or the appropriate regulatory body before commencing the installation. This permit process ensures that the installation adheres to local codes and standards. Upon completing the installation, your contractor should provide a certificate of acceptance from ESA or the regulatory authority. This certificate is evidence that the installation meets safety and electrical code standards.

    • EVITP Accreditation: Homeowners are encouraged to consider working with contractors accredited by the Electric Vehicle Infrastructure Training Program (EVITP). This accreditation ensures that the contractor has undergone specific training for the installation and maintenance of EV charging systems. Working with an EVITP-accredited contractor provides added assurance of expertise in this specialized field.

By collaborating with a licensed electrical contractor who complies with permitting and regulatory requirements and, if possible, holds EVITP accreditation, you can ensure that your EV charger installation is not only efficient but also safe and compliant with all relevant standards. These measures provide peace of mind and help maintain the integrity of your home's electrical infrastructure.


4.       Contractor's Fees and Materials: When evaluating the cost of EV charger installation, it's important to consider both the contractor's fees and the materials required for the installation. The contractor's fees encompass labor, expertise, and any additional services offered. These fees can vary based on several factors:

    • Experience: Contractors with extensive experience in EV charger installations may charge higher fees, reflecting their expertise and track record.

    • Location: The cost of labor can vary by region, with contractors in metropolitan areas often charging more than those in rural areas.

    • Complexity: The complexity of the installation, including factors like wiring, conduit runs, and equipment placement, can influence the labor fees.

    • Charger Type: The type of EV charger being installed may impact the installation complexity and, consequently, the contractor's fees. For example, more advanced chargers with additional features may require more time and expertise to install.

Materials, including wiring, conduits, circuit breakers, and the charger itself, also contribute to the overall cost. The quality and type of materials used can impact the installation's durability and longevity.

When evaluating contractor fees and material costs, it's essential to balance cost considerations with the contractor's qualifications and reputation. Opting for the lowest bid may not necessarily result in the best value if it compromises the quality and safety of the installation. Therefore, it's advisable to choose a reputable contractor with relevant experience and expertise, even if their fees are slightly higher.


5.       Location of Installation: Whether you choose to install the charger in your garage or driveway can impact the cost. Garage installations are often more straightforward and cost-effective since they require less extensive wiring and weatherproofing. Installing a charger outdoors in the driveway may involve additional expenses for weatherproofing and trenching.Top of Form

Conclusion

Installing an electric vehicle (EV) charger at home is a valuable investment that provides convenience and contributes to a cleaner environment. To ensure a successful installation, it's important to consider the cost of both labor and materials, in addition to other factors like charger type, electrical capacity, permitting, and regulations. By carefully evaluating these elements and collaborating with a qualified electrical contractor, you can make an informed decision and enjoy the benefits of convenient EV charging at home.

Installation of Tesla Wall Connector EV Charger.

Electrical System Maintenance

Electrical systems are an essential component of any building, and their proper functioning is critical for safety and productivity. Like any other machinery, electrical systems require regular maintenance to ensure that they operate efficiently and safely. Neglecting annual maintenance can lead to costly and potentially dangerous issues, making it crucial to schedule regular maintenance checks and infrared scanning.

An electrical system consists of numerous components, including cables, transformers, breakers, switches, and panels. Over time, these components can wear down and experience problems such as loose connections, corrosion, and overheating. These issues can cause electrical failures, fires, or even explosions. Regular maintenance checks and infrared scanning can help identify these issues before they become catastrophic.

Infrared scanning is a non-destructive testing technique that detects temperature differences in electrical components. It is an effective way to identify potential problems before they cause damage or failures. Infrared scanning can help detect overheating components, loose connections, and other issues that could lead to electrical fires. It can also help identify components that are nearing the end of their useful life, allowing for timely replacement and avoiding costly failures.

Infrared image of a heavy duty disconnect switch.

There are numerous benefits to completing annual maintenance on electrical systems, including:

  1. Increased safety: Regular maintenance checks can help ensure that electrical systems are functioning correctly and safely, reducing the risk of electrical fires, explosions, or other hazards.

  2. Reduced downtime: Electrical failures can cause significant downtime and lost productivity. Regular maintenance checks can help identify potential issues before they cause a breakdown, reducing downtime and increasing productivity.

  3. Improved efficiency: Properly maintained electrical systems operate more efficiently, reducing energy consumption and costs.

  4. Extended equipment life: Regular maintenance checks and infrared scanning can help identify potential issues and allow for timely repairs or replacement, extending the life of electrical equipment and reducing the need for costly replacements.

In conclusion, completing annual maintenance on electrical systems is crucial for safety, efficiency, and productivity. Infrared scanning is an effective tool for identifying potential problems before they become catastrophic. Neglecting maintenance checks can lead to costly and dangerous issues, making it essential to schedule regular maintenance checks to keep electrical systems functioning safely and efficiently.

Contact ElecTrade today to discuss a maintenance program that is customized to your facility and your specific needs.

519-648-3532

info@electrade.ca

ElecTrade Electrician performing maintenance on a distribution transformer.

Commercial LED Lighting Retrofits

Upgrading to LED lighting is one of the most cost-effective ways to save energy and reduce your electricity bills. However, when it comes to retrofitting existing fixtures, you have a few different options to choose from, including Type A and Type B retrofit, as well as complete lighting replacements. In this blog post, we will explore the difference between these options and the benefits of each.

Type A Retrofit:

Type A retrofit, also known as "plug and play," refers to LED lamps that are designed to be installed directly into an existing fixture without any modifications to the wiring or electrical components. These retrofit lamps are designed to work with the existing ballast, just like traditional fluorescent lamps, and can be easily installed by simply removing the old lamp and replacing it with the LED lamp.

The benefits of Type A retrofit are that it is easy to install and requires no rewiring or modification to the fixture. This means that you can upgrade your lighting system quickly and without any major changes to your existing infrastructure. Additionally, Type A retrofit is a cost-effective option, as it eliminates the need for expensive electrical work.

However, one downside to Type A retrofit is that it may not be compatible with all ballasts. Some ballasts may not be able to provide the correct voltage or current to the LED lamp, which can cause flickering, buzzing, or premature failure of the lamp. It is important to check with the manufacturer of the LED lamp to ensure compatibility before making the switch to Type A retrofit.

Type B Retrofit:

Type B retrofit, on the other hand, is a little more involved than Type A retrofit. These LED lamps are designed to bypass the ballast and be wired directly to the electrical circuit. This means that when you install a Type B retrofit, you need to remove the existing ballast and rewire the fixture to connect the retrofit directly to the electrical circuit.

The benefits of Type B retrofit are that it is more efficient than Type A retrofit, as it eliminates the energy consumption of the ballast. Additionally, Type B retrofit is a more reliable option, as it eliminates the potential failure points of the ballast. This can result in a longer lifespan and lower maintenance costs.

However, one downside to Type B retrofit is that it requires more electrical work and may be more expensive than Type A retrofit. Additionally, if the wiring in the fixture is not up to code, it may need to be updated to ensure safety and compliance.

Complete Lighting Replacement:

Finally, the third option for upgrading to LED lighting is to replace the entire fixture with a new LED fixture. This option is the most involved and expensive, but it offers the most flexibility and control over the lighting system.

The benefits of complete lighting replacement are that you can design a new lighting system that is tailored to your specific needs and preferences. This can include selecting the color temperature, color rendering index (CRI), and light output of the new fixtures. Additionally, complete lighting replacement can be a more energy-efficient option, as the new fixtures can be designed to meet the specific lighting needs of the space.

However, one downside to complete lighting replacement is that it is the most expensive option and may require significant electrical work. Additionally, replacing the entire fixture may not be necessary in all cases, especially if the existing fixture is in good condition.

From a maintenance perspective, the type A and type B retrofits are becoming increasingly popular due to the fact that when a lamp burns out, it can be replaced by anyone rather than with a integral LED fixture where the entire fixture would need to be replaced, requiring the services of a licensed electrician.

In conclusion, when it comes to upgrading to LED lighting, you have a few different options to choose from. Type A retrofit is an easy and cost-effective option, but it may not be compatible with all ballasts. Type B retrofit is a more involved option, but it offers greater efficiency and reliability. Complete lighting replacement is the most flexible and customizable option, but it is the most expensive option.

Contact ElecTrade today to discuss the different lighting upgrade options and what is right for you and your application.

519-648-3532

info@electrade.ca

When do you need an electrical permit?

We often get asked by our customers when is an electrical permit required?

Most of the time our customers are surprised by the answer, which is pretty much all the time when you are having electrical work done. There are a few exceptions but 95% of the time a permit is required.

The law in the province of Ontario states that all electrical work must be completed by a licensed electrical contractor (or homeowner) and a permit or inspection notification must be filed.

The only exceptions to this rule are the replacement of fixtures and small hard wired appliances with a like for like replacement. So if you are simply replacing a light switch or fixture, that work would not legally require an inspection notification to be filed.

However, if you are adding a new outlet, relocating a switch or adding pot lights, you are required to have a permit for that work.

The permit or notification protects you in multiple ways:

  • it ensures that the contractor you are working with is licensed

  • it ensures that the contractor you are working with is covered by WSIB and is insured, ESA requires a minimum of $2,000,000.00 of liability insurance.

  • in the event that something goes wrong, the Certificate of Inspection you receive when the job is complete provides proof that the job was inspected and that it would be covered by insurance.

If you are working with or considering working with a contractor that is telling you that either you don’t need a permit or that you as the home owner needs to file for that permit yourself, then chances are that you are not working with a Licensed Electrical Contractor. Run! Get them out of your house or business as fast as you can. We have been called in after these types of “contractors” make a mess, create unsafe living conditions for families and take your money and don’t return. It’s never a good situation.

Verify that who you’re working with is a Licensed Electrical Contractor. There are multiple ways to do this.

  • Ask for their electrical contractors license and number. We all have a unique number that identifies us as being licensed. Ours is 7013880. This number legally must be included on trucks/ vans, websites, emails, quotes, etc.

  • Check them out on the Electrical Safety Authorities website. All licensed electrical contractors in Ontario will be listed on their website. You can filter by location and type of services we offer. Here is a link to that website: https://esasafe.com/newsroom-2020/how-to-verify-a-licensed-electrical-contractor/

If you have any questions about any of this information or if you would like to schedule your next project, we would love to hear from you.

We can be reached at:

Phone: 519-648-ELEC (3532)

Email: info@electrade.ca

Web: www.ElecTrade.ca

IMG_6119.jpeg

Bathroom Outlets

IMG_4751.jpeg

Hi everyone,

Today we wanted to share a quick tip with you about your bathroom outlets.

We receive calls on a fairly regular basis that customers bathroom outlets aren’t working. The customer hears the outlet trip, they head down to their breaker or fuse panel but there are no tripped breakers or blown fuses. Help! They say!

Before they drop $100.00+ on a service call and we rush over to their house we walk them through a quick and easy troubleshooting tip and here it is:

Unplug whatever it was that you were using when the outlet tripped then go to each washroom in your house until you find the one with the GFCI outlet. A GFCI outlet can be identified by the two little buttons in the center of the outlet like the one in the image below. Usually this is the cause of the trip. Push in the reset button on the outlet and head back to the washroom you were in when the outlet stopped working. Generally this will solve the problem. If not, search the rest of your home for another GFCI outlet and see if it’s been tripped and perform the same test.

All washroom outlets are required to have GFCI protected outlets and many electricians will wire them downstream from the GFCI outlet so they only need to install one $30.00+ outlet.

The same troubleshooting tip can be used for outdoor outlets as well. Check all of your outdoor outlets for a GFCI outlet as they’ll likely all be fed from that one outlet.

If the GFCI keeps tripping, make sure that you have unplugged everything on that circuit and try resetting it.

If that doesn’t solve the problem, ElecTrade Electrical Contractors has electricians standing by who would be happy to help solve your problem.

Call or email us today at 519-648-ELEC(3532) or info@electrade.ca

Transform your living space by updating your lighting.


Is your living space feeling old and out of date? Do you feel as though is lacks your personality? A quick refresh of your lighting may be the answer! Here are a few tips to modernize your living space with lighting:

  1. Add some colour. Select a fixture that adds some splash to your space. Go bold with reds or yellows. They can really pull a space together when selected carefully. If you’re not the adventurous type but still want an update, chromes and golds are the latest trend.

  2. Chose geometric chandeliers, pendants and sconces for a modern look.

  3. Complement your main lighting pieces with recessed lighting to add more light to subtly. Choose an eyeball or gimbal trim to wash walls and specific art pieces.

  4. Replace incandescent bulbs with LED’s. Your hydro bill will reflect this change and your lumen output will be dramatically increased

  5. Replace standard light switches with dimmers. This allows you complete control of your lighting levels. You can add smart devices to allow you to control your lights from your phone. Whether you’re home or away on vacation.

Call ElecTrade Electrical Contractors today at 519-648-ELEC (3532) or visit us on the web at www.electrade.ca to help with your next lighting project!

IMG_8284.jpeg

Custom lighting

When designing and building your dream home, something just as important as general layout is your lighting layout and design.
Consider your style, is it modern or contemporary? Also consider how you’re planning to use each space.

Do your research and get to know the style that you want to achieve. Flip through interior design magazines and visit local lighting shops to hone in on the style that you are going for.

Involve your electrical contractor early in the process. Make sure that the electrician that you chose is willing to work with you and your design and the other stakeholders in the project. Don’t just go with a cookie cutter style electrical contractor if you are going for a custom look and feel.
Remember, not all electrical contractors are created equal.

Here are some things to consider when starting the lighting design process:

Recessed lighting or Pot lights:

A popular way to provide general or flood lighting to a space is using recessed lighting fixtures or pot lights. With new LED technologies, this can be done efficiently and completely customized to your design.

You can use carefully located recessed fixtures with features like a gimbal adjustment to wash the walls or to accent specific pieces that you want to bring attention to.

For a modern look consider recessed fixtures with a square trim and/ or multiple lamps with a rectangular shaped trim.
Trims are usually available in many different colours to further your unique design.

Accent Lighting:

The next step in the lighting design process is to select the areas you want to show your unique style. You can accomplish this by using chandeliers, pendant fixtures, wall sconces and other luminaires with character.

If the space is continuous or open concept, consider carrying a similar theme through the area. This will show that thought was put into the layout and selection of the lighting and will maximize your style.

Outdoor living spaces:

The trend for these spaces is clean lines and minimalistic approaches, start with recessed lighting in the soffits or horizontal fascia. Then move on to areas that you want accented with a touch of your style.

Remember, less is often more. We’ve all seen the houses with 25 soffit pot lights. It doesn’t work well…

Landscape Lighting:

Consider accenting your natural areas with carefully located landscape luminaires.

Again, less is more. If there are specific shrubs, trees or hardscapes you want accented, focus on those areas.

Call ElecTrade Electrical Contractors to work with you on your next electrical project. We have been involved with numerous custom builds and have the experience required to bring your design to life.

We take a team approach to each of our projects and welcome the opportunity to collaborate with you, the designer and general contractor involved with the build.

Whether your next project is a 10,000 square foot dream home or cottage, a custom finished basement or just a small addition you are putting on your home, ElecTrade Electrical Contractors is eager to work with you to maximize the potential of your next lighting or electrical project.

IMG_1867.jpeg
IMG_8141.jpeg
IMG_8142.jpeg

How to test your GFCI Outlets

Remember to test your GFCI outlets on a monthly basis. Here is a quick tutorial to show you how to test and reset your GFCI outlets.

Most houses now have ground fault circuit interrupter or GFCI receptacles in kitchens, bathrooms and exteriors to keep you and your family safe from potential shocks. What most people don’t know is that in order to keep these outlets working properly, they need to be tested regularly.

All GFCI outlets have two buttons on them, “TEST” and RESET”. On a monthly basis you should take the time to test each one in your home.

Follow these simple steps to keep your GFCI’s in good working condition

  1. Unplug anything that may be plugged into the outlet.

  2. Push in on the TEST button on the outlet. You should hear a click, and if equipped, the green LED indicator light will go out. Other styles of outlets have a red indicator light that will illuminate when tripped. The test is now complete.

  3. Push in on the RESET button to reset the outlets to resume safe use.

If the outlet doesn’t trip or reset when the respective buttons are pushed, it’s time to call in ElecTrade. Call us at 519-648-ELEC (3532) or find us on the internet at www.electrade.ca

How to reset a circuit breaker.

From time to time circuit breakers in your home will trip. This may be because the circuit has been overloaded. Prior to trying to reset the breaker ensure that you unplug the appliances that were plugged into the circuit. Once you’ve unplugged everything from the circuit it’s time to head down to your circuit breaker panel.

The first thing that you are looking for is a breaker handle that’s in the middle or tripped position. The handle will feel loose or “spongy”.

Once you have located the tripped circuit breaker follow the following steps to reset it:

  1. Push the handle of the circuit breaker all the way to the off position.

  2. Once the breaker is in the off position, push the breaker’s handle all the way back to the on position.

  3. You’re done! If the breaker continues to trip, it’s time to call in your electrician.

Call ElecTrade at 519-648-ELEC(3532) with any questions or if you need service.

public.jpeg